先日、関西PHP勉強会で@shin1x1さんがHerokuについての発表があり、以前FacebookアプリをHerokuで使ってた(挫折した)を思い出し、興味が出てきたので使ってみることにしました。
アプリケーションサーバ(Dynosというらしい)の稼働時間が1ヶ月で750時間までなら無料で使えるので、個人の開発用なら気軽に使えそうです。
調べてみると、Getting Started with Symfony2 on Heroku というのがあり、Symfony2も簡単に使えそうだったので、試しにデプロイして使ってみることにしました。
今回の目標
- HerokuでSymfony2のデモを動かすようにする
- Heroku上でnginxを入れて動かすようにする
- MySQL(ClearDB)、PaperTrail アドオンを入れてよりアプリケーションらしくしてみる
環境
- Mac OS X 10.9.2
- Git 1.8.5.2
- Symfony2 (2.3.16)
前提条件
- herokuのアカウントを登録、アドオン追加のため、クレジットカードも入力済みとする
- Git, Heroku Toolbelt, Composer はインストール済みとする
Symfony2 バージョンについて
本当なら最新の安定版である、2.5を使いたかったのですが、デプロイ(git push)した際に、以下のエラーが発生して解決できなかったので、Long-term support版である、2.3を使いました。
PHP Fatal error:  Class 'Sensio\Bundle\GeneratorBundle\SensioGeneratorBundle' not found in /tmp/build_89265b58-e27c-4eb0-9280-554d69e6bd20/app/AppKernel.php on line 25
       Script Sensio\Bundle\DistributionBundle\Composer\ScriptHandler::clearCache handling the post-install-cmd event terminated with an exception
もし、問題解決した方がいらっしゃいましたらコメント等で残していただけるとありがたいです!
Symfony2をインストール
Composerでインストールしました。
$ composer create-project symfony/framework-standard-edition heroku_symfony2/ "2.3.*"
リポジトリ作成
Gitリポジトリを作成します。
$ cd heroku_symfony2
$ git init
$ git add -A
$ git commit -m "initial commit"
Heroku上にアプリケーション作成
heroku-symfony2-test0515というアプリケーション名で作成しました。
$ heroku login
$ heroku create -r heroku --app heroku-symfony2-test0515
Creating heroku-symfony2-test0515... done, stack is cedar
http://heroku-symfony2-test0515.herokuapp.com/ | git@heroku.com:heroku-symfony2-test0515.git
Git remote heroku added
タイムゾーンを変更
Herokuアプリケーション上のタイムゾーンを調べてみます。
$ heroku run bash
Running `bash` attached to terminal... up, run.6887
~ $ date
Sun Jun 29 02:00:04 UTC 2014
~ $ exit
タイムゾーンがUTCになっているのでJSTに変更します。
$ heroku config:add TZ=Asia/Tokyo
Setting config vars and restarting heroku-symfony2-test0515... done, v53
TZ: Asia/Tokyo

$ heroku run bash
~ $ date
Sun Jun 29 11:01:14 JST 2014
~ $ exit
Procfileを作成
Symfony2をHerokuで動かすための設定をProcfileというファイルに記述します。
heroku_symfony2/web 以下をドキュメントルートになるようにし、今回はとりあえずApacheで動かすようにしました。
$ echo "web: bin/heroku-php-apache2 web/" > Procfile
$ git add .
$ git commit -m "Procfile for Apache and PHP"
Symfony2のサンプル(Welcome)ページを表示するようにする
heroku_symfony2/web/app_dev.phpを編集して以下の箇所をコメントアウトします。
/**
if (isset($_SERVER['HTTP_CLIENT_IP'])
    || isset($_SERVER['HTTP_X_FORWARDED_FOR'])
    || !in_array(@$_SERVER['REMOTE_ADDR'], array('127.0.0.1', 'fe80::1', '::1'))
) {
    header('HTTP/1.0 403 Forbidden');
    exit('You are not allowed to access this file. Check '.basename(__FILE__).' for more information.');
}
**/
リポジトリに登録します。
$ git add -A
$ git commit -m "Edit app_dev.php"
デプロイ
git pushするだけでデプロイが完了します。
$ git push heroku master
Fetching repository, done.
Counting objects: 9, done.
Delta compression using up to 4 threads.
Compressing objects: 100% (5/5), done.
Writing objects: 100% (5/5), 435 bytes | 0 bytes/s, done.
Total 5 (delta 4), reused 0 (delta 0)

-----> PHP app detected

 !     WARNING:        Your composer.json requires an unknown PHP version.
       Defaulting to PHP 5.5.12; install may fail!
       See https://devcenter.heroku.com/categories/php

-----> Setting up runtime environment...
       - PHP 5.5.12
       - Apache 2.4.9
       - Nginx 1.4.6
-----> Installing PHP extensions:
       - opcache (automatic; bundled, using 'ext-opcache.ini')
-----> Installing dependencies...
       Composer version 28c65b5425f7f8722c260e3787b74c1ea6b37e3b 2014-06-22 18:24:28
       Loading composer repositories with package information
       Installing dependencies from lock file
…
       Generating optimized autoload files
       Creating the "app/config/parameters.yml" file
       Clearing the cache for the dev environment with debug true
       Installing assets using the hard copy option
       Installing assets for Symfony\Bundle\FrameworkBundle into web/bundles/framework
       Installing assets for Acme\DemoBundle into web/bundles/acmedemo
       Installing assets for Sensio\Bundle\DistributionBundle into web/bundles/sensiodistribution
-----> Building runtime environment...
-----> Discovering process types
       Procfile declares types -> web

-----> Compressing... done, 66.7MB
-----> Launching... done, v5
       http://heroku-symfony2-test0515.herokuapp.com/ deployed to Heroku

To git@heroku.com:heroku-symfony2-test0515.git
   da1a1da..9bf5a6b  master -> master
WARNINGが出ていますが、とりあえずデプロイは正常に完了しました。
デプロイ時に、パラメータファイル app/config/parameters.ymlを生成したり、キャッシュを削除してくれたり、Assetsをインストールしてくれたりと色々やってくれるので便利ですね。
heroku openでブラウザからHerokuアプリケーションを開いて、http://<Herokuアプリケーション名>.herokuapp.com/app_dev.php にアクセスすれば、Symfony2のWelcomeページが表示されるはずです。
ログを確認できるようにする
これで、最低限アプリケーションを動かせるようになりましたので、さらに改良していきます。
次はログを見れるようにしてみます。
Herokuの場合、ログ出力を標準出力(STDOUT)か、標準エラー出力(STDERR)にすれば良いので、app/config/config_prod.yml を以下のように編集します。
- "%kernel.logs_dir%/%kernel.environment%.log"
+ "php://stderr"
リポジトリに登録してデプロイします。
$ git add .
$ git commit -m "log to STDERR in prod"
$ git push heroku master
以下のコマンドでログをリアルタイムで見ることができるようになりました。
$ heroku logs --tail
Papertrailアドオンでもっと便利にログを見る
このままでもログを見ることはできますが、複数台Heroku(Dynos)を動かすとログがそれぞれの溜まってしまい、ログを見るのが面倒です。
また、デプロイする度にログファイルが消えてしまうため、Papertrailアドオンを入れて、便利にログ監視できるようにします。
$ heroku addons:add papertrail:choklad
Adding papertrail:choklad on heroku-symfony2-test0515... done, v51 (free)
Welcome to Papertrail. Questions and ideas are welcome (support@papertrailapp.com). Happy logging!
Use `heroku addons:docs papertrail` to view documentation.
chokladはFree版を指定しています。
https://papertrailapp.com/systems/<Herokuアプリケーション名>/events に行くと、ログを見ることができます。
ログのタイムゾーンがUTCのままなので、右上の[Me]→[Profile]のリンク先からログのタイムゾーンを変更することができます。
Dynosを停止(0台にする)してもログは残るので後で確認することができますし、ログのフィルタリングや検索もできるので大変便利です。
ただし、Free版は10MBまでしか保存できない等の制限あるので、不便に感じたなら有料プランに変更するのもいいでしょう。
Symfony2でHeroku用の新しい環境を作成
Symfony2には、prod、dev、testという環境が予め用意されており、それぞれ本番用、開発用、テスト(PHPUnit実行)用となっています。
そこで、Heroku上で動かすための環境(heroku)を追加します。
新しい環境を作成して、使いこなす方法 | Symfony2日本語ドキュメント を参考にしました。
設定ファイルの追加
今回は開発用にしたいので、app/config_heroku.yml を app/config_dev.yml からコピーして作成します。
もし、本番用の環境にしたい場合は、app/config/config.ymlからコピーしてください。
heroku環境用に一部編集していることに注意してください。
imports:
    - { resource: config.yml }

framework:
    router:
        resource: "%kernel.root_dir%/config/routing_heroku.yml"
        strict_requirements: true
    profiler: { only_exceptions: false }

web_profiler:
    toolbar: true
    intercept_redirects: false

monolog:
    handlers:
        main:
            type:  stream
            path:  "php://stderr"
            level: debug
        firephp:
            type:  firephp
            level: info
        chromephp:
            type:  chromephp
            level: info

assetic:
    use_controller: true

#swiftmailer:
#    delivery_address: me@example.com
app/config/routing_heroku.yml を app/config/routing_dev.yml からコピーして作成します。
_wdt:
    resource: "@WebProfilerBundle/Resources/config/routing/wdt.xml"
    prefix:   /_wdt

_profiler:
    resource: "@WebProfilerBundle/Resources/config/routing/profiler.xml"
    prefix:   /_profiler

_configurator:
    resource: "@SensioDistributionBundle/Resources/config/routing/webconfigurator.xml"
    prefix:   /_configurator

_main:
    resource: routing.yml

# AcmeDemoBundle routes (to be removed)
_acme_demo:
    resource: "@AcmeDemoBundle/Resources/config/routing.yml"
web/app_heroku.php を web/app_dev.php からコピーして作成します。
一部編集していることに注意してください。
<?php

use Symfony\Component\HttpFoundation\Request;
use Symfony\Component\Debug\Debug;

// If you don't want to setup permissions the proper way, just uncomment the following PHP line
// read http://symfony.com/doc/current/book/installation.html#configuration-and-setup for more information
//umask(0000);

// This check prevents access to debug front controllers that are deployed by accident to production servers.
// Feel free to remove this, extend it, or make something more sophisticated.
/**
if (isset($_SERVER['HTTP_CLIENT_IP'])
    || isset($_SERVER['HTTP_X_FORWARDED_FOR'])
    || !in_array(@$_SERVER['REMOTE_ADDR'], array('127.0.0.1', 'fe80::1', '::1'))
) {
    header('HTTP/1.0 403 Forbidden');
    exit('You are not allowed to access this file. Check '.basename(__FILE__).' for more information.');
}
**/

$loader = require_once __DIR__.'/../app/bootstrap.php.cache';
Debug::enable();

require_once __DIR__.'/../app/AppKernel.php';

$kernel = new AppKernel('heroku', true);
$kernel->loadClassCache();
$request = Request::createFromGlobals();
$response = $kernel->handle($request);
$response->send();
$kernel->terminate($request, $response);
app/AppKernel.php で heroku環境を追加します。
- if (in_array($this->getEnvironment(), array('dev', 'test'))) {
+ if (in_array($this->getEnvironment(), array('heroku', 'dev', 'test'))) {
Webサーバをnginxに変更
Herokuではnginxも使えるので、Apacheからnginxに変更してみます。
Procfileを編集します。
web: vendor/bin/heroku-php-nginx -C heroku_nginx.conf web
heroku_nginx.confは後で追加するnginxの設定ファイルです。末尾のwebはドキュメントルートを指定しています。
nginxの設定ファイルを追加
heroku_nginx.confをheroku_symfony2直下(リポジトリ直下)に作成します。
セキュリティも考慮して、app_heroku.php以外にアクセスできないようにしています。
location / {
    try_files $uri @rewriteapp;
}

location @rewriteapp {
    rewrite ^(.*)$ /app_heroku.php/$1 last;
}

location ~ ^/app_heroku\.php(/|$) {
    fastcgi_pass heroku-fcgi;
    fastcgi_split_path_info ^(.+\.php)(/.*)$;
    include fastcgi_params;
    fastcgi_param SCRIPT_FILENAME $document_root$fastcgi_script_name;
    fastcgi_param HTTPS off;
}

location ~ ^/(app|app_dev)\.php(/|$) {
    deny all;
}

location ~ ^/config\.php(/|$) {
    deny all;
}
composer.json を編集
composer.jsonのbin-dirを以下の通りに編集しないとデプロイ時に失敗してしまいます。
参考URL: HerokuがPHPに正式対応したのでFuelPHP動かしてみた
    "config": {
        "bin-dir": "vendor/bin"
    },
デプロイ
$ git add -A
$ git commit -m "Setting heroku configuration of symfony2"
$ git push heroku master
$ heroku open
デプロイすると、Symfony2のWelcomeページが表示されます。
画面下のプロファイラから環境がherokuになっていることが確認できます。

データベース(MySQL)接続を設定
HerokuのClearDBアドオンを入れて、Symfony2でデータベース接続できるようにしてみます。
ClearDBアドオンをインストール
無料プランもありますが、予めクレジットカードを登録しないと使えません。
$ heroku addons:add cleardb:ignite
Adding cleardb:ignite on heroku-symfony2-test0515... done, v49 (free)
Use `heroku addons:docs cleardb` to view documentation.
igniteはFreeプランです。
設定を確認します。
$ heroku config | grep CLEARDB_DATABASE_URL
CLEARDB_DATABASE_URL: mysql://xxxxxxxx:xxxxxxxxxx@us-cdbr-east-06.cleardb.net/heroku_xxxxxxxxxxxxx?reconnect=true
CLEARDB_DATABASE_URL: mysql://ユーザ名:パスワード@サーバ名/データベース?reconnect=true となっています。
Symfony2側の設定をしていきますが、例としてユーザ(user)テーブルを作成して、そのCURD画面を作成します。
Heroku上のMySQLデータベースにテーブルを作成
create_table.sqlを作成しします。
create table user (
  id int(11) not null auto_increment,
  name varchar(30) not null,
  email varchar(100) not null,
  password varchar(100) not null,
  address varchar(200),
  primary key (id)
);
以下のコマンドで作成したSQLを流し込めばテーブルが作成されます。
$ mysql -uxxxxxxxxxxxx -pxxxxxxx -hus-cdbr-east-06.cleardb.net heroku_xxxxxxxxxxxx < create_table.sql
データベース接続情報を設定ファイルに記述
app/config/parameters_heroku.yml
parameters:
    database_driver: pdo_mysql
    database_host: us-cdbr-east-06.cleardb.net
    database_port: 3306
    database_name: heroku_xxxxxxxxxxxx
    database_user: xxxxxxxxxxxxxx
    database_password: xxxxxxx
app/config/config_heroku.yml で parameters_heroku.ymlを読み込むようにします。
imports:
    - { resource: config.yml }
+   - { resource: parameters_heroku.yml }
エンティティクラスを作成
データベースをリバースエンジニアリングしてエンティティクラスを作ります。
メタデータをYAML形式でエクスポート
$ php app/console doctrine:mapping:convert yml ./src/Acme/DemoBundle/Resources/config/doctrine --from-database --force --env=heroku

[2014-06-27 19:58:33] doctrine.DEBUG: SHOW FULL TABLES WHERE Table_type = 'BASE TABLE' [] []
[2014-06-27 19:58:55] doctrine.DEBUG: SELECT COLUMN_NAME AS Field, COLUMN_TYPE AS Type, IS_NULLABLE AS `Null`, COLUMN_KEY AS `Key`, COLUMN_DEFAULT AS `Default`, EXTRA AS Extra, COLUMN_COMMENT AS Comment, CHARACTER_SET_NAME AS CharacterSet, COLLATION_NAME AS CollactionName FROM information_schema.COLUMNS WHERE TABLE_SCHEMA = 'heroku_xxxxxxxxxxxxxxx' AND TABLE_NAME = 'user' [] []
[2014-06-27 19:58:56] doctrine.DEBUG: SELECT DISTINCT k.`CONSTRAINT_NAME`, k.`COLUMN_NAME`, k.`REFERENCED_TABLE_NAME`, k.`REFERENCED_COLUMN_NAME` /*!50116 , c.update_rule, c.delete_rule */ FROM information_schema.key_column_usage k /*!50116 INNER JOIN information_schema.referential_constraints c ON   c.constraint_name = k.constraint_name AND   c.table_name = 'user' */ WHERE k.table_name = 'user' AND k.table_schema = 'heroku_xxxxxxxxxxxxxxx' /*!50116 AND c.constraint_schema = 'heroku_xxxxxxxxxxxxxxx' */ AND k.`REFERENCED_COLUMN_NAME` is not NULL [] []
[2014-06-27 19:58:58] doctrine.DEBUG: SELECT TABLE_NAME AS `Table`, NON_UNIQUE AS Non_Unique, INDEX_NAME AS Key_name, SEQ_IN_INDEX AS Seq_in_index, COLUMN_NAME AS Column_Name, COLLATION AS Collation, CARDINALITY AS Cardinality, SUB_PART AS Sub_Part, PACKED AS Packed, NULLABLE AS `Null`, INDEX_TYPE AS Index_Type, COMMENT AS Comment FROM information_schema.STATISTICS WHERE TABLE_NAME = 'user' AND TABLE_SCHEMA = 'heroku_xxxxxxxxxxxxxxx' [] []
Processing entity "User"

Exporting "yml" mapping information to "/heroku_symfony2/src/Acme/DemoBundle/Resources/config/doctrine"
エクスポートしたメタデータからエンティティクラスを生成
$ php app/console doctrine:mapping:import AcmeDemoBundle annotation --env=heroku

[2014-06-27 19:59:41] doctrine.DEBUG: SHOW FULL TABLES WHERE Table_type = 'BASE TABLE' [] []
[2014-06-27 19:59:42] doctrine.DEBUG: SELECT COLUMN_NAME AS Field, COLUMN_TYPE AS Type, IS_NULLABLE AS `Null`, COLUMN_KEY AS `Key`, COLUMN_DEFAULT AS `Default`, EXTRA AS Extra, COLUMN_COMMENT AS Comment, CHARACTER_SET_NAME AS CharacterSet, COLLATION_NAME AS CollactionName FROM information_schema.COLUMNS WHERE TABLE_SCHEMA = 'heroku_xxxxxxxxxxxxxxx' AND TABLE_NAME = 'user' [] []
[2014-06-27 19:59:42] doctrine.DEBUG: SELECT DISTINCT k.`CONSTRAINT_NAME`, k.`COLUMN_NAME`, k.`REFERENCED_TABLE_NAME`, k.`REFERENCED_COLUMN_NAME` /*!50116 , c.update_rule, c.delete_rule */ FROM information_schema.key_column_usage k /*!50116 INNER JOIN information_schema.referential_constraints c ON   c.constraint_name = k.constraint_name AND   c.table_name = 'user' */ WHERE k.table_name = 'user' AND k.table_schema = 'heroku_xxxxxxxxxxxxxxx' /*!50116 AND c.constraint_schema = 'heroku_xxxxxxxxxxxxxxx' */ AND k.`REFERENCED_COLUMN_NAME` is not NULL [] []
[2014-06-27 19:59:42] doctrine.DEBUG: SELECT TABLE_NAME AS `Table`, NON_UNIQUE AS Non_Unique, INDEX_NAME AS Key_name, SEQ_IN_INDEX AS Seq_in_index, COLUMN_NAME AS Column_Name, COLLATION AS Collation, CARDINALITY AS Cardinality, SUB_PART AS Sub_Part, PACKED AS Packed, NULLABLE AS `Null`, INDEX_TYPE AS Index_Type, COMMENT AS Comment FROM information_schema.STATISTICS WHERE TABLE_NAME = 'user' AND TABLE_SCHEMA = 'heroku_xxxxxxxxxxxxxxx' [] []
Importing mapping information from "default" entity manager
  > writing /heroku_symfony2/src/Acme/DemoBundle/Entity/User.php
src/Acme/DemoBundle/EntityにUser.phpが作成されます。
エンティティクラスにゲッター/セッターを追加
$ rm ./src/Acme/DemoBundle/Resources/config/doctrine/User.orm.yml
$ php app/console doctrine:generate:entities AcmeDemoBundle --no-backup --env=heroku

Generating entities for bundle "AcmeDemoBundle"
  > generating Acme\DemoBundle\Entity\User
CRUDを作成する
コマンド一発でUserエンティティに基づいたCRUDが作成できます。
$ php app/console doctrine:generate:crud --entity=AcmeDemoBundle:User --with-write --format=annotation


  Welcome to the Doctrine2 CRUD generator


This command helps you generate CRUD controllers and templates.

First, you need to give the entity for which you want to generate a CRUD.
You can give an entity that does not exist yet and the wizard will help
you defining it.

You must use the shortcut notation like AcmeBlogBundle:Post.

The Entity shortcut name [AcmeDemoBundle:User]:

By default, the generator creates two actions: list and show.
You can also ask it to generate "write" actions: new, update, and delete.

Do you want to generate the "write" actions [yes]?

Determine the format to use for the generated CRUD.

Configuration format (yml, xml, php, or annotation) [annotation]:

Determine the routes prefix (all the routes will be "mounted" under this
prefix: /prefix/, /prefix/new, ...).

Routes prefix [/user]:


  Summary before generation


You are going to generate a CRUD controller for "AcmeDemoBundle:User"
using the "annotation" format.

Do you confirm generation [yes]?


  CRUD generation


Generating the CRUD code: OK
Generating the Form code: OK


  You can now start using the generated code!
すべてエンターキーを押していくと、src/Acme/DemoBundle/Contoller/UserContoller.phpなどが作成されます。
ルーティング追加
作成したCRUDにアクセスできるようにルーティングを追加します。
src/Acme/DemoBundle/Resources/config/routing.yml
# 追加
user:
    resource: "@AcmeDemoBundle/Controller/UserController.php"
    type:     annotation
デプロイ
$ git add -A
$ git commit -m "herokuでデータベースを使うようする"
$ git push heroku master
確認
$ heroku open
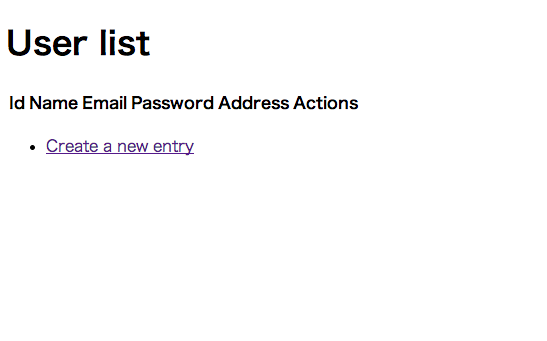
ページを開き、 http://<Herokuアプリケーション名>.herokuapp.com/user にアクセスするとuserテーブル内のデータ一覧が表示されます。
※まだデータが一件も入っていないので、「Create a new entry」からデータを追加してください。
セッションをmemcachedに保存する
セッション情報をmemcachedに保存しようとしたのですが、Symfony2の設定が上手く行かず、設定できませんでした。
設定したことがある方は、教えていただけるとありがたいです!
最後に
HerokuでSymfony2を使えるようにしてみました。
設定等に時間がかかりましたが、慣れてしまえばあっという間に使えてしまうので、個人的開発にはとても向いていると思います。
便利なアドオンなどがありましたら使ってみて、皆さんにシェアしたいと思います。